• Home
  • Class Policy
  • Curriculum
    • Getting Started >
      • What is Graphics?
      • Course Syllabus
      • Copyright
      • Layout Sequence
      • Time Sheets
      • Survey
    • Type >
      • Type Lesson
      • Typeface Search
      • Type Study Guide
      • Typeface Search Cover
      • Typography Assignment
      • Personifying a Word >
        • Brainstorming
        • Thumbnails
        • Rough
        • Making the Vector
        • Turning in the Project
    • Illustrator >
      • What are Pixels
      • What is resolution?
      • Illustrator Dog
      • Rasters vs. Vectors
      • Practice Vector
      • Illustrator Vector
      • Vectoing Issues
      • Vector Touchups
      • Saving, Printing, and Emailing
    • Screen Printing >
      • Syllabus & Assignment
      • Thumbnails
      • Rough
      • Comprehensive
      • Degreasing a Screen
      • Coating a Screen
      • Exposing a Screen
      • Washing out a Screen
      • Patching Pinholes
      • Blocking Out
      • Cutting Paper to Print on
      • Printing Color 1
      • Printing Other Colors
      • Reclaiming a Screen
      • Choosing Keepers
      • Matting a Print
      • Submitting for Grading
    • Notepad >
      • Assignment & Syllabus
      • Thumbnails
      • Rough
      • Using a Scanner & Photoshop
      • Comprehensive
      • Making a 4-Up
      • Printing a Proof Sheet
      • Choosing Paper
      • Printing Your Notepad
      • Cutting Notepads
      • Padding
      • Final Trim
      • Mounting
      • Submitting for Grading
    • Vinyl Decal & Logo >
      • Brainstorming & Thumbnails
      • Making a Rough
      • Comprehensive (Vectoring)
      • Making the Decal Template
      • Adding the Graphics & Logo
      • Using Space
      • Uploading a Photo
      • Downloading an Image from Drive
      • Making a Practice Selection
      • Saving & Emailing the Decal
      • Appying the Decal
    • Principles of Design >
      • Ad Critique Assignment >
        • Scanning Your Ad
        • Straightening as Ad
        • Cropping the Ad
        • Making a Screen Recording
      • Vinyl Jacket Project >
        • Vinyl Layout in Illustrtor
        • Vinyl Layout Thumbnails
        • Vinyl Layout Rough
        • Making a Bar Code
        • Adding & Rescaling Items
        • Printing, Trimming & Assembling
        • Turning in the Project
      • Advertisement (Cyber Only) >
        • Unique Selling Point
        • Advertisement Thumbnails
        • Advertisement Rough
        • Taking a Photo
        • Getting Photos to the Computer
        • Downloading an Image from Drive
        • Making a Cut Out
        • Compose your Graphics
        • Assembling in InDesign
        • Critiquing your Advertisement
        • Turning in the Project
  • Links
    • NHS
    • NESD
    • Sapphire
    • Mr. Tate's Page
    • Student Google
    • NHS Graphics
  • Graphics Schools
  • Contact
  • Vocab
  • Standards

Screen Printing - Rough

Picture
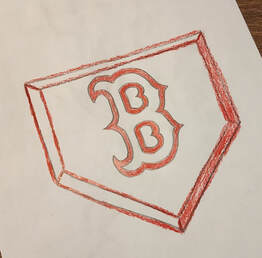
The rough for your screen print is totally different from the rough that you made for your notepad. You need to sketch the image at full size (max of 8" x 8") and then color it with colored pencil. When you and I discuss your design, with it colored, it will be easy for the both of us to see how each of the colors are composed. The one similarity between the notepads rough and the screen's rough is that it too needs to be approved. When your finished sketching and have added color, come see me and we'll discuss how to move forward with the project.

Screen Printing

    Syllabus & Assignment
    Thumbnails
    Rough
    Comprehensive
    Degreasing a Screen
    Coating a Screen
    Exposing a Screen
    Washing out a Screen
    Patching Pinholes
    Blocking Out
    
Cutting Paper to Print on
    Printing the First Color
    Printing Other Colors
    Reclaiming a Screen
    Choosing Keepers
    Matting a Print
    Submitting for Grading
Powered by Create your own unique website with customizable templates.