Screen Printing - Making a Mat
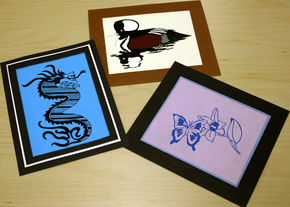 These three screen prints have each been matted differently.
The last step in the Hand Cut Screen Printing project is to mat one of the good prints. During the Offset Lithography Notepad, we discussed how professional artwork usually comes surrounded with a cardboard frame. For the notepad we emulated this by mounting on sheet. This time, you will actually cut out a frame. Stores like Michael's or Hobby Lobby have framing departments that will make mats this way, but it's rather pricey.
Choose the very best of the five prints that you determined to be the keepers. This is the print that you need to mat. Professionally, stores like Michael's would use very thick colored cardboard to mat a print. At this level of the course we will just you the colored mat board that you used for the the mount and the back of your notepad. Follow the steps on the Making a Mat handout and it will be rather easy to mat your print. The video below will show you the process of making a mat following the handout from above. |
Screen Printing
Syllabus & Assignment
Thumbnails Rough Comprehensive Degreasing a Screen Coating a Screen Exposing a Screen Washing out a Screen Patching Pinholes Blocking Out Cutting Paper to Print on Printing the First Color Printing Other Colors Reclaiming a Screen Choosing Keepers Matting a Print Submitting for Grading |
|
|
- Home
- Class Policy
-
Curriculum
- Getting Started >
- Type >
-
Illustrator
>
-
Screen Printing
>
- Syllabus & Assignment
- Thumbnails
- Rough
- Comprehensive
- Degreasing a Screen
- Coating a Screen
- Exposing a Screen
- Washing out a Screen
- Patching Pinholes
- Blocking Out
- Cutting Paper to Print on
- Printing Color 1
- Printing Other Colors
- Reclaiming a Screen
- Choosing Keepers
- Matting a Print
- Submitting for Grading
- Notepad >
- Vinyl Decal & Logo >
-
Principles of Design
>
- Links
- Graphics Schools
- Contact
- Vocab
- Standards
